Beginner Crochet: Ten Tips I Wish Tutorials Had Taught Me
It’s been eight months since I started crocheting amigurumi. I’m having a lot of fun with it, particularly as it still allows me to engage in other things I also enjoy, like science fiction, fantasy, gaming, and so on. So far I’ve completed about a dozen projects and have progressed fairly well with my skills (though I still have lots to learn!). While reflecting on how far I’ve come, I realized there are things I’ve learned along the way that would have been helpful to know up front. I’m sure I’m not alone in this, so, without further ado, here are ten beginner crochet tips I wish amigurumi tutorials had taught me!
1. Learn the Jargon
In some ways I probably struggled with this the most when I first got started. I did have the benefit of having knitted (a little bit) before learning crochet so some terms were familiar or at least similar. The beginner crochet tutorials I read were good about explaining basic stitch abbreviations and acronyms (like “YO” for “yarn over”), but even so, there were other terms I came across that made me feel like I was reading a foreign language. Things like:
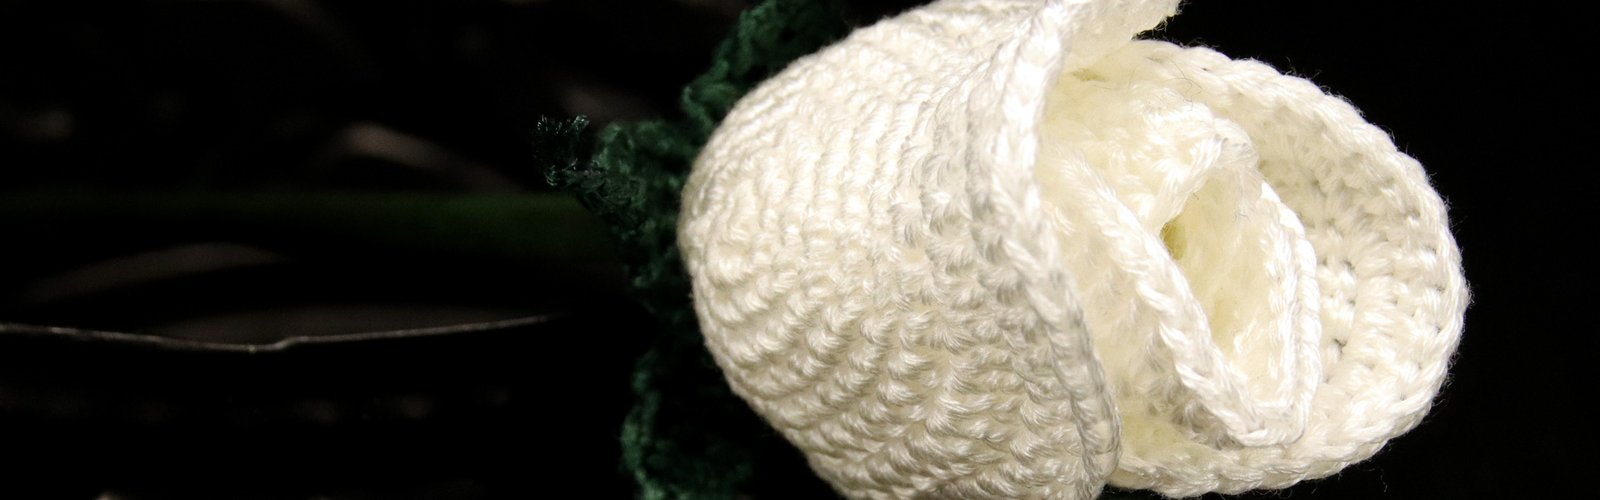
- Amigurumi, as in, Your amigurumi is so cute! Amigurumi is the Japanese art of crocheting (or knitting) cute stuffed animals and anthropomorphic creatures (as opposed to scarves, blankets, sweaters, etc).
- CAL, as in, Join a CAL to quickly get experience. It means “crochet along” and is used in a group setting. The idea is for multiple people to crochet together at the same time. The CAL organizer might specify a particular pattern everyone is to use, or the CAL might just have a theme, for example, “fantasy creatures”. A CAL usually runs for a certain period of time and might have certain guidelines or prizes.
- Colorway, as in, That colorway is beautiful. It refers to the specific name (or number) the dyer or manufacturer gave a particular yarn to describe its color. For example, if the yarn label says “Parrot” on it, that’s the colorway. Colorway is not really the same thing as color, because yarn can be in the same colorway but have slight differences in hue or tone depending on the dye batch it came from. So, you could get some “Royal Purple” colorway yarn from dyelot ABC, then a while later buy some more “Royal Purple” colorway yarn from dyelot DEF, and when you put them side by side, the actual color of the skeins will be similar but not exactly the same. (This is why it’s important to buy enough yarn from the same dyelot to be sure you don’t run out for a particular project.)
- FO, as in, Round 26: FO. So far I’ve only seen a few patterns written this way (so I assume it’s not a common practice), but in this context it means “fasten off”, or tie off the yarn to finish that piece and/or the entire project.
- FO, as in, Show me your FO! In this context it means “finished object”, the item you end up with when you complete your crochet project.
- Frog, frogging, or frogged, as in, I have to frog this, or I don’t like frogging work, or I frogged a project yesterday. This is a slang term used in crochet, knit, and even cross-stitch communities to describe the act of unraveling work (pulling out a portion, or all, of the stitches). It’s a play on words: frogs say “ribbit, ribbit, ribbit” when they croak; when crafters find a mistake in their work, or decide they no longer want to continue with that work (or want to recover the yarn to do something else), they “rip it, rip it, rip it”. Hint: You do this a lot as a beginner!
- MCAL, as in, My MCAL turned out pretty well. It means “mystery crochet along”. Same idea as a CAL except the designer/organizer only provides hints as to what the finished object will be (or what it will look like), so the participants don’t necessarily know going into it what they are working on.
- NATCROMO, as in, Are you going to do anything for NATCROMO? National Crochet Month, which I didn’t learn until well after the fact is March. Similar idea to NANOWRIMO (National Novel Writing Month). Mark your calendars!
- Stash, as in, My stash is taking over the house. It refers to the supply of yarn you have on hand, which may or may not actually be taking over your house if you have a tendency to go to your local yarn shop and leave with, um, large bags of yarn.
2. Join a Community
To be fair, this was suggested to me up front but I didn’t do it until after almost a month of crocheting on my own, partially because I am shy and partially because the front-facing page of the website that was recommended didn’t actually hook me (no pun intended). In hindsight, I should have listened and joined right away.
The community I joined is called Ravelry and I highly recommend it. It’s proven to be a great resource. At first, Ravelry can be intimidating because of all the stuff it has to offer but it’s worth taking the time to poke around and see what’s there. There are thousands of people of all ages and experience on this website and tons of groups. It would be difficult not to find a group on Ravelry that isn’t also interested in the things you want to crochet! (The first groups I joined were “EVE Online Crafters”, “N7 Crafters”, and “Nerdy Hookers”. Yes, really.)
Sometimes I just spend an evening browsing the various forums to read posts from other beginners or the conversations people have in general about fiber arts, like how to dye yarn, and I’ve learned a lot that way. Ravelry is a very positive community overall which helps a beginner feel encouraged to keep going and try new things.
Mostly I use Ravelry to keep track of patterns I want to try and the progress I’ve made on projects I have on the go, but now that I’m more confident in my skills I’m participating in my groups more and I’ve joined my first CAL. You can see my public Ravelry projects here.
Through Ravelry and the crochet community in general I’ve also discovered other bloggers to follow. My favorites so far are All About Ami, Amigurumi To Go, Crochet Spot, and PlanetJune. Check them out!
3. You’re A Hooker Now. Get it? Get it??

Knitters and crocheters are not all rocking chair grannies with a lot of cats and a shotgun within easy reach. (I’m sure some are.) In fact, a fair amount of men are involved in the fiber arts community too.
The community has a great sense of humor. For some reason I didn’t really expect that—I’m not sure why. Be prepared to encounter more innuendo in your travels. You’ve just become a hooker; your balls are bigger than your spouse’s; sex might actually mean buying yarn (stash enhancement experience); a man sock doesn’t go on his foot, and so on. You might be surprised at what turns up in what you thought was an innocent Google search for baby beanies. Most of it will still be safe for work. (I said most!) Yes, some people really do crochet penis warmers. It’s all in good fun and can result in some great laughs about protecting important stuff from frostbite. >.>
4. You’re Going to Need a Kit
I got into crochet because my mom bought me a “Jolly Santa” crochet kit for Christmas as a stocking stuffer. It came with enough yarn for that pattern plus a plastic 3mm hook. When that kit proved too challenging for me to do as a beginner, she then gave me a plastic 7mm hook and some leftover yarn. I took to the internet to find tutorials, and here we are.
But when I say you’re going to need a kit, I don’t mean a pattern prepackaged with yarn and hook. That kind of kit was honestly nothing more than a gateway drug! Very quickly I found myself collecting patterns I wanted to do, then making numerous trips to craft stores to buy supplies. Then I collected more patterns and found that what I had on hand wasn’t suitable, or I was struggling because I didn’t have a certain thing, so I made more trips to the store.
Save yourself some time and gas by getting most of what you’re going to need up front.
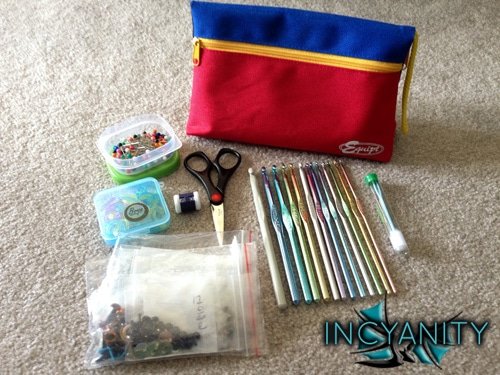
My crochet kit includes the following:
- Crochet hooks in a variety of sizes. At first I thought I could get away with having only one or two hooks. In reality, you never know what you might need, though that doesn’t mean you should buy every hook size under the sun. Hooks can be made of plastic, bamboo, aluminum, steel, etc. They can also have grips on them. Get hooks that feel comfortable and fun to you, but if you’re going to be working with hooks smaller than 4.5mm, I’d stay away from plastic as the plastic can easily bend or snap (been there, done that). I’ve come to prefer Boye aluminum crochet hooks. I have thirteen hooks ranging from 2.25mm to 7mm, but so far I use the 2.25mm, 3.5mm, and 7mm ones the most.
- Stitch markers. Amigurumi is often crocheted in spiral rounds, meaning there’s no definitive end between one “row” and another, so if you lose your place you’re really going to be stuck. Sure, you can use a piece of contrasting colored yarn to mark a stitch, but it can easily be pulled out. Actual stitch markers can mean the difference between a FO that is “just okay” because you lost your place and only sort of figured out where you were, and a FO that you’re really happy with because you were able to properly keep track all the way through. A safety pin works, but they’re sharp and not very fun. Stitch markers come in a variety of styles, some of which are like safety pins, others which are more rubbery and flexible, and still others which are so fancy they look like they ought to be earrings or key chains. Whichever style you buy, be sure they lock so they can’t accidentally slip out of your work.
- Push pins. Sewing amigurumi together can be a pain without these, particularly if the pieces are small (like arms). Get some that have fairly large heads so the pins don’t disappear between your stitches into the interior of your work. Also, if your pins come in a cheap plastic box like mine did (it was taped together to keep it closed), you’ll find the box tends to pop open a lot, spilling pins everywhere. My solution was to buy a rectangular salad dressing container (intended for use in a lunchbox) from the grocery store. It’s still small but snaps shut securely.
- A row/stitch counter. These also come in a variety of styles and are handy for keeping track of where you are in your work rather than using a scrap of paper and pen. I tend to use the first digit to indicate which row or round I’m on and the second digit to count the stitches in that round.
- A small pair of scissors. There’s nothing worse than having to rummage around in the junk drawer for a pair of scissors when you’re ready to fasten off, and then having to maneuver big bulky blades into position. Big scissors make me worry I might accidentally cut into the work itself and ruin it. A nice small pair of scissors is less likely to catch an errant piece of the work and can be easily carried around with your other supplies.
- Yarn needles. Also called tapestry needles. I have a few sizes for when I’m working with different weights of yarn. Most of them have blunt ends but having one or two with a sharp point can be useful, particularly if your amigurumi is firmly stuffed. Also get a small plastic tube to carry the needles in so they don’t get lost.
- Safety eyes. You can use buttons or felt, or just stitch on eyes using yarn, but actual safety eyes can make your amigurumi take on a totally different kind of personality. Unfortunately (at least in my area) they are hard to find in stores so I order mine from Glass Eyes Online or 6060 on Etsy. Depending on the size of the amigurumi you make, you’ll probably want some 6mm, 9mm, or even 15mm eyes in a variety of colors. I keep mine organized in very small ziplock baggies stashed inside a couple of slightly larger ziplock baggies.
- A pencil case. Depending on where you shop, hook cases can be pretty pricey and the ones I’ve seen tend to only have space in them for the hooks and not much else. If you don’t want to spend that kind of money, or would prefer to keep all the other supplies in the kit too, a pencil case will do just fine. The one I use has a zippered pouch on each side. I put the hooks, stitch markers, stitch counter, and push pins in one pouch, and the scissors, yarn needles, and safety eyes in the other.
5. You’re Going to Need Somewhere to Keep Your Stash

Crocheting doesn’t really use more yarn than knitting, so don’t believe anybody who tells you otherwise. But…remember how I mentioned gateway drugs earlier? If you really get into crochet, you will experience more yarn in your life overall. Maybe a lot more. Pretty soon, going to a craft store will become a dangerous affair where “I just need one more skein in this color” turns into “I saw all these balls and OMG they are gorgeous!” People make jokes about this and from what I’ve seen it’s because a lot of people succumb to it really easily.
Where do you keep all that yarn? At first you can try piling the balls on the floor in a corner, or maybe in a drawer, or stuffing them all in a shopping bag that you put in your closet or under the bed. Fact is, unless you are remarkably strong-willed (but just assume you aren’t, it’ll be easier in the long run), your stash won’t be confined to that small space for very long. There are just too many pretty yarns out there…
Some people put up cubby-hole shelves to stack their yarn on, which is great if they are lucky enough to have a spare room or set of shelves they can set aside for crafting. If that’s not an option, you can consider doing what I did:

Buy a stylish basket like this one. Get the biggest one you can afford that fits in with your décor at home. Make sure it has a lid. I chose the one I did because it sort of looks like a treasure chest which I thought was fun.
Put your yarn in it and close the lid. Now the yarn is always nearby but still out of sight where it won’t look messy to guests or be tempting for pets and kids to get into. This is also how you can (try) to rein in the desire to buy more yarn: Make it a rule for yourself that you’re not allowed to get more yarn if the basket is full. If the basket can’t be closed because there’s too much in it…well, you better get cracking on some more crochet!

Take care to consider whether or not the basket is smooth inside. If it’s uneven, your yarn might snag and become damaged. My basket is wicker so has edges sticking out on the inside. I used a large clear garbage bag to line the basket before putting the yarn in.

Speaking of bags, kitchen catchers are handy for putting leftovers in so that these little balls don’t get lost among the bigger skeins or otherwise buried at the bottom. Yes, these have to fit inside the basket too! I keep the bags closed with Bevara sealing clips from IKEA.
6. (Hook) Size Isn’t Everything
My kit contains a variety of hook sizes. Hook size is important if you are crocheting a garment or have to ensure your finished object meets a particular measurement, in which case you should be sure to use the hook the pattern calls for (unless you can’t match gauge using that size, but that’s a topic for another time). Otherwise, in amigurumi the hook size is more about how big you want your finished object to be. Bigger hook = bigger FO; smaller hook = smaller FO.
For example, the pattern for Timothy T-Rex called for a 3.75mm hook but I wanted to use super bulky yarn to get a big stuffed toy out of it. I had to use a 7mm hook to accommodate that thicker yarn. Instead of a 7″ tall dinosaur, mine came out over twice as big: 16″ tall. And that’s perfectly fine.
7. Magic Rings Are Awesome
Many amigurumi patterns begin with instructions like ch 2, work 6 sc into first ch (6). The idea is to create a closed circle that begins the spiral for the rest of the piece. Problem is, if you don’t crochet very tightly, starting this way can leave a hole in the middle of the circle. This isn’t desirable since the stuffing will be visible and could even be pulled out through the gap.
Unless the amigurumi pattern has a very good reason for starting with chains, you can generally always substitute that first round’s instruction with a magic ring (also called a magic circle, adjustable ring, or magic loop) instead. The magic ring is a better choice because you are sure to end up without a hole when you’re done.
The magic ring was difficult to learn from all the tutorials I looked at until I found this fantastic video by Patrones Valhalla:
8. Invisible Decrease Everything
As a beginner, you’ll probably work most of your amigurumi projects using just the single crochet stitch. As I understand it, amigurumi is mostly made with single crochet regardless of skill level, with more complicated stitches (like popcorn or bobble stitch) used only for highlights or to achieve a certain look in particular areas of the object.
When working with single crochet, a pattern might have instructions in it to “dec”, “sc dec”, “sc2tog”, “sc3tog”, or just “tog”, indicating you’re supposed to decrease the number of indicated stitches in your round. The problem with decreasing in rounds is that it generally leaves an unsightly bump in the work.
Thankfully, all of these decreases can be treated as if the pattern actually calls for an invisible decrease (“invdec”). An invisible decrease is exactly what it sounds like. When you’re done, you generally can’t tell you decreased.
So, if the pattern calls for “sc2tog”, this is the equivalent of one “invdec”. Push your hook through the front loop only of the next two stitches. This means you now have three loops on the hook. Yarn over, pull through the first two loops, then yarn over again and pull through the remaining two loops. Ta da! (If the pattern said “sc3tog”, you’d push through the front loops of the next three stitches and have one extra to pull through on.)
Here’s a great video from PlanetJune which shows how to invisible decrease:
This technique may not work well for patterns done in rows (ie, the work requires turning) since the decrease is only worked in the front loops. The reverse side of those same stitches will look unfinished or missed. But, if nobody is going to see the other side of the work (like the inside of a garment) then an invisible decrease will work just fine so long as you do them on the right side.
9. Invisible Color Changes
One of the things I was most dissatisfied with early on in spiral amigurumi was color changes. Tutorials teach how to switch color halfway through the last stitch of the previous color, which is perfectly fine to do if your new color only lasts for a portion of one round. If the new color persists for at least one full round or more, that “normal” method results in an unsightly misalignment where the start of the color change meets up with itself 360° later due to the nature of working in a spiral.
If this misalignment happens at the back of the work where no one will ever see it, well, that’s not so bad, but since amigurumi FOs tend to be handled or viewed from all angles it would be nice to have cleaner color changes. In spiral work, you can get pretty close to an invisible color change and minimize that awful misalignment by following these steps:
Part 1: The Invisible Finish
- Complete the last stitch of the first color you were working with.
- Put a stitch marker in the next stitch in the round (if there isn’t one there already). This helps avoid working in the wrong stitch by mistake.
- Cut the yarn, leaving a tail about an inch long.
- Pull on your hook to increase the size of the loop still on the hook until the cut end of the yarn is pulled completely through.
- Thread the yarn through a yarn needle.
- Skip the stitch with the marker in it and insert the needle from front to back under both loops of the next stitch. Pull through but not too tightly.
- Insert the needle into the middle of the stitch the yarn came out of originally (the last stitch of the color you were working with) and come out under the back loop of that stitch.
- Pull until the new loop matches the size of the other stitches (don’t crimp or buckle the work). Take the needle off the yarn. You’ve just completed an invisible finish (or invisible fasten off).
Here’s a great video from Ahooka which shows how to do the invisible finish:
Part 2: Add the New Color
- With the new color, create a slipnot with a tail of about one inch on your hook. Insert the hook under the two loops you just created that are sitting on top of the stitch with the marker in it.
- Yarn over and pull through. You now have two loops on the hook.
- Yarn over again and pull through both loops. This is the first single crochet of the new color and is called a standing single crochet stitch. Move the stitch marker to this stitch if the color change happens to coincide with the start of a new round. (With practice, moving the stitch marker becomes unnecessary. Instead, it can simply be removed and set aside until it is needed again for the start of the next round.)
- If needed, tighten the loose end of the previous color to make sure the shape of the stitch and the work remains consistent, then tie the loose end of the previous color to the tail of the slipnot to secure it.
- Carry on with the new color in spiral rounds as usual. Go back to step one above if changing to another color if that next color will also be used for one or more full rounds.
Here’s another great video from Ahooka that shows how to add the new color:
10. We Learn By Doing
Some tutorials start with the premise that beginners should do row after row after row of the same stitch in order to learn them properly. There’s probably some merit to that (practice does make perfect) but unless all you ever plan to make are dishcloths and scarves, this method can also be really boring and even discouraging. Hey look, I made a rectangle! Er, wait… Know what I mean? Some people aren’t going to feel like they actually accomplished something (or didn’t accomplish enough) if all they made is a geometric shape.
So, as a beginner with amigurumi, I say this: Don’t be afraid to jump right in with something that appears “more complicated”. It probably isn’t as complicated as you expect. There are lots of really easy patterns out there that will allow you to get the practice you need with single crochet, increases, decreases, and other techniques while also ending up with a FO that actually looks like something. If all you want is the practice, grab some leftover yarn and do the whole pattern in that one color if you want. The point is to end up with a FO that has the right shape and has consistent stitches, even if the color is “wrong”. If it’s not right or you’re not happy, frog the work and try again. Also try practicing those patterns with a larger hook and thicker yarn (easier to see the stitches) or, if that isn’t working, go the opposite way: try a smaller hook and lighter weight yarn. You’ll quickly figure out where your comfort zone is.
I found the Beginner Lessons from Expression Fiber Arts (particularly, How to Crochet a Flower) very useful to encourage a sense of accomplishment early on. Other easy patterns I would recommend if you’re just starting out are the Angry Birds Pig from Nerdigurumi, Pac-Man Ghosts from Gemugurumi, and Newborn Guinea Pigs (Ravelry) from Kati Galusz.
Looking for more tips? Check out my next tips post, Beginner Crochet: Ten More Tips to Enhance Your Hobby!
Do you have any other beginner crochet tips that you wish someone had told you up front when you first started crocheting? Let me know in the comments below!


It’s Winter, Therefore…Crafts!
Winter finally arrived in Calgary, just in time for Christmas! We had snow for the holiday and the c
Crochet Disappointments
Disappointments. They happen. Some are minor, like a recipe that didn’t turn out the way you expec
Coveted Crochet aka My Work Was Stolen
Anybody remember this guy? My very adorable crochet elephant, my first proper amigurumi project that
This site uses Akismet to reduce spam. Learn how your comment data is processed.
Leave a Reply